
Clash Verge Rev Download & Setup Guide
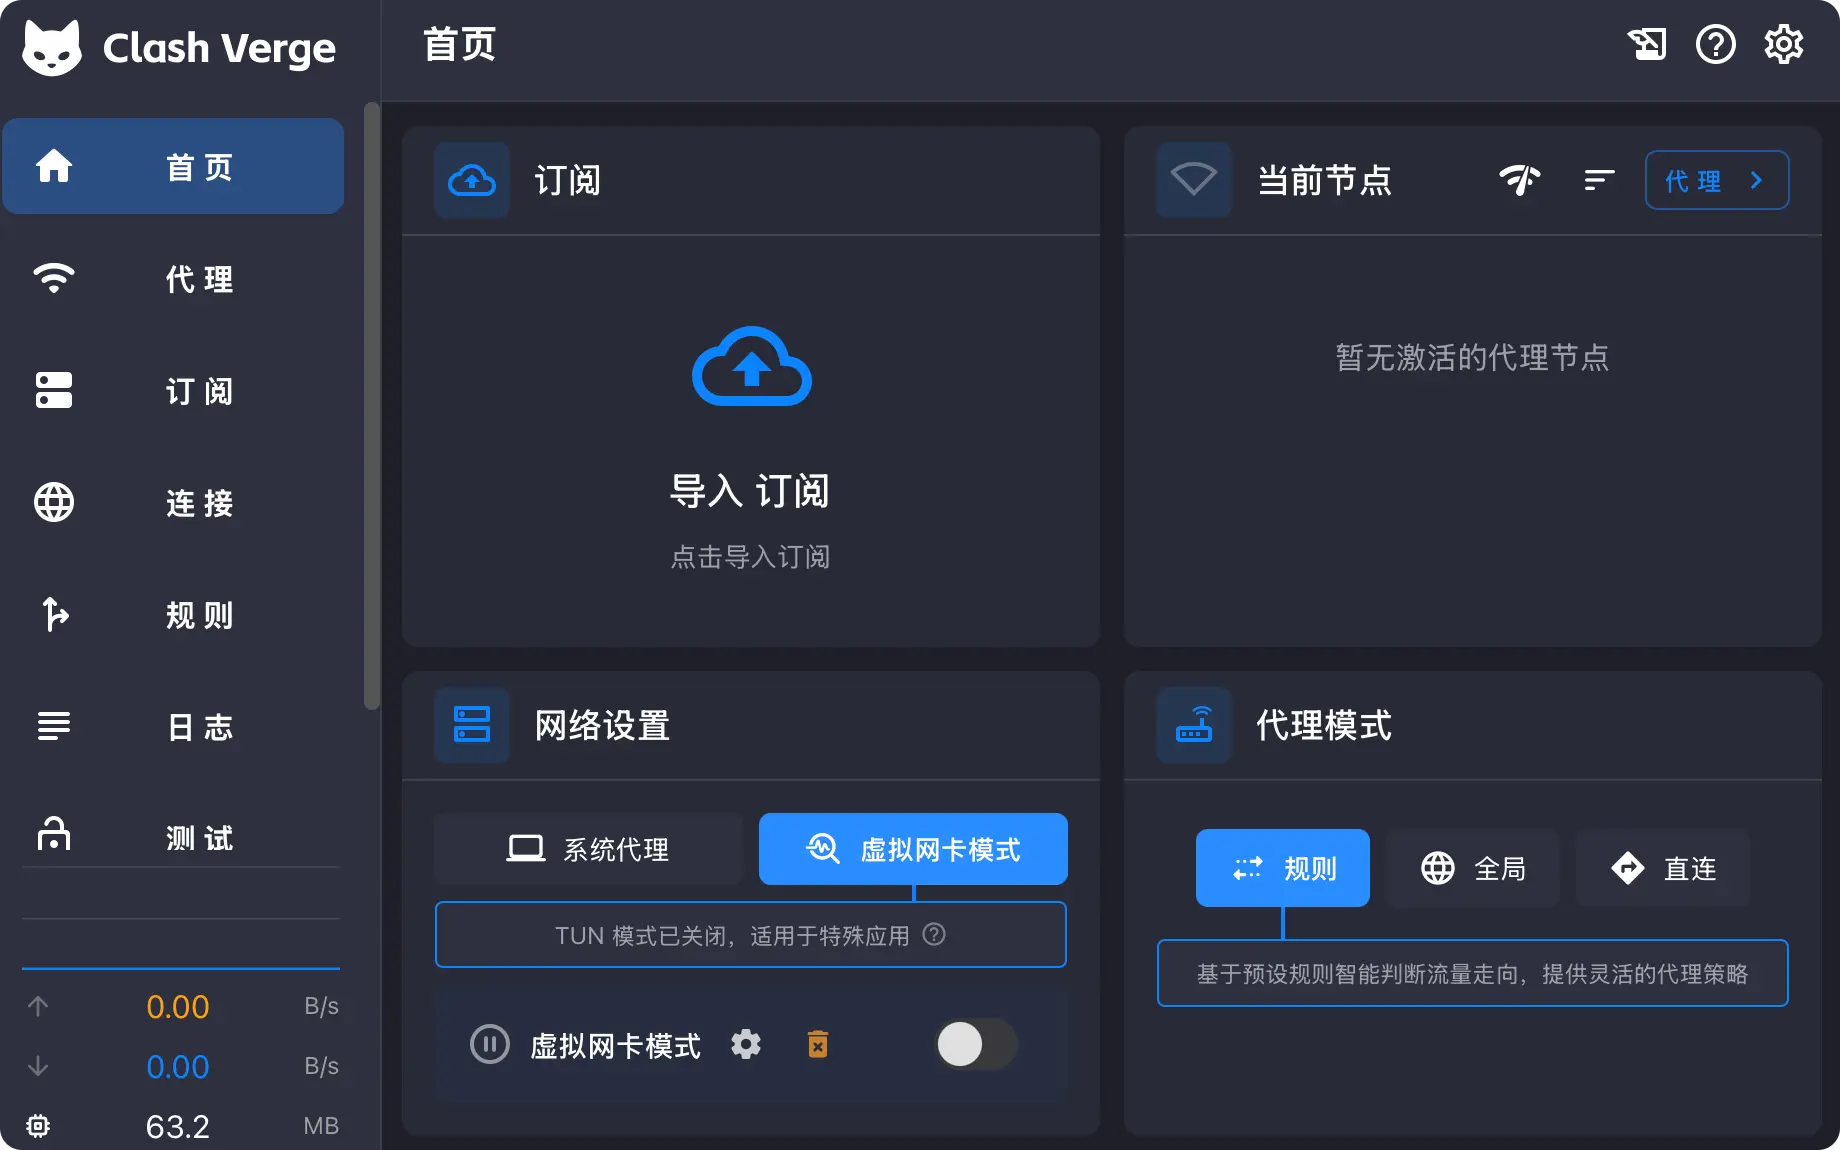
Clash Verge Rev is an open-source desktop client built with Tauri and powered by the Mihomo (Clash Meta) core. After the original Clash Verge was discontinued, the community took over development. It has a clean interface, frequent updates, and is our top recommendation for desktop users.
| Platforms | Core | License | Price |
|---|---|---|---|
| Windows · macOS · Linux | Mihomo | GPL-3.0 | Free |
Download
Clash Verge Rev is published only on its official GitHub releases page. Open the page and pick the right file from the Assets list of the latest release:
| Device | File name contains | Notes |
|---|---|---|
| Windows PC | x64-setup.exe | For almost all Intel and AMD PCs |
| Windows on ARM | arm64-setup.exe | Snapdragon and other ARM-based Windows devices |
| Mac (Apple silicon) | aarch64.dmg | M1, M2, M3, M4, and later |
| Mac (Intel) | x64.dmg | Macs with Intel processors |
| Linux | amd64.deb / x86_64.rpm | deb for Debian/Ubuntu, rpm for Fedora/openSUSE |
Install
setup.exe file and follow the installer. If you see "Windows protected your PC", click More info → Run anyway..dmg and drag Clash Verge into Applications. If macOS says the developer cannot be verified, go to System Settings → Privacy & Security and click Open Anyway.Run the matching command in your download folder:
# Debian / Ubuntu
sudo apt install ./Clash.Verge_*_amd64.deb

# Fedora / openSUSE
sudo dnf install ./Clash.Verge-*.x86_64.rpm
Setup
Get your subscription link
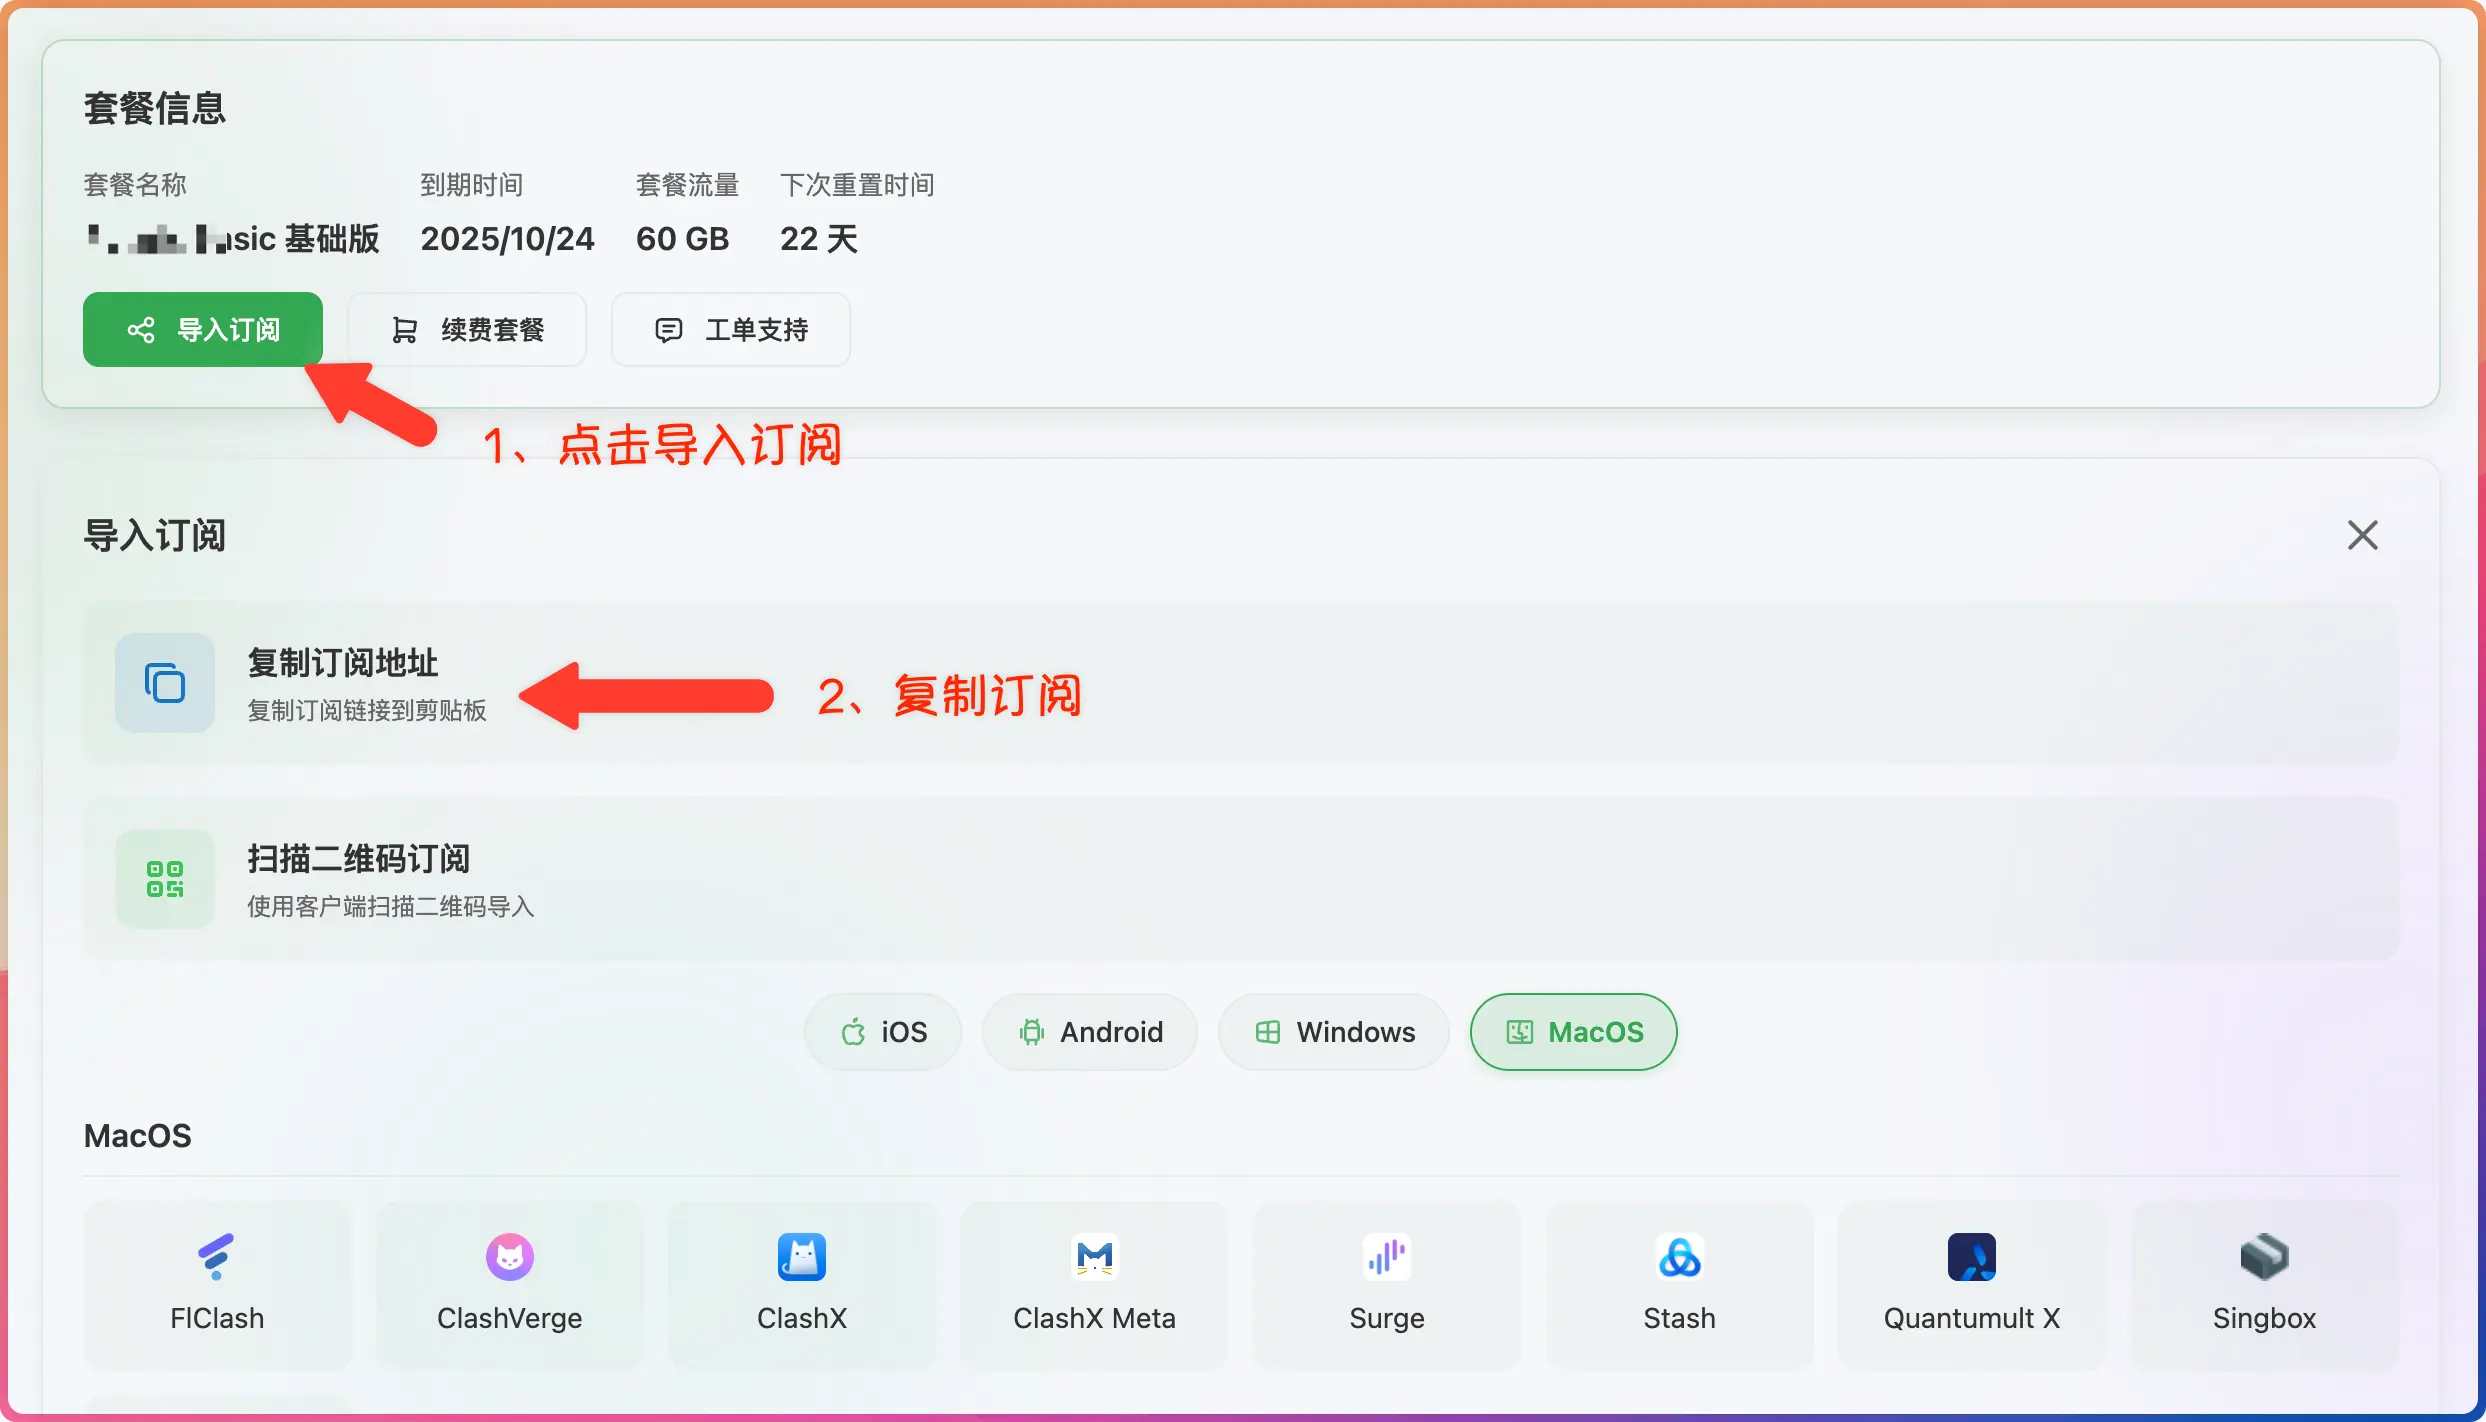
Clash Verge Rev is only a client and does not include any servers. Sign in to your provider's dashboard and copy your subscription link (usually under "Subscribe" or "Copy subscription URL").
Import the subscription
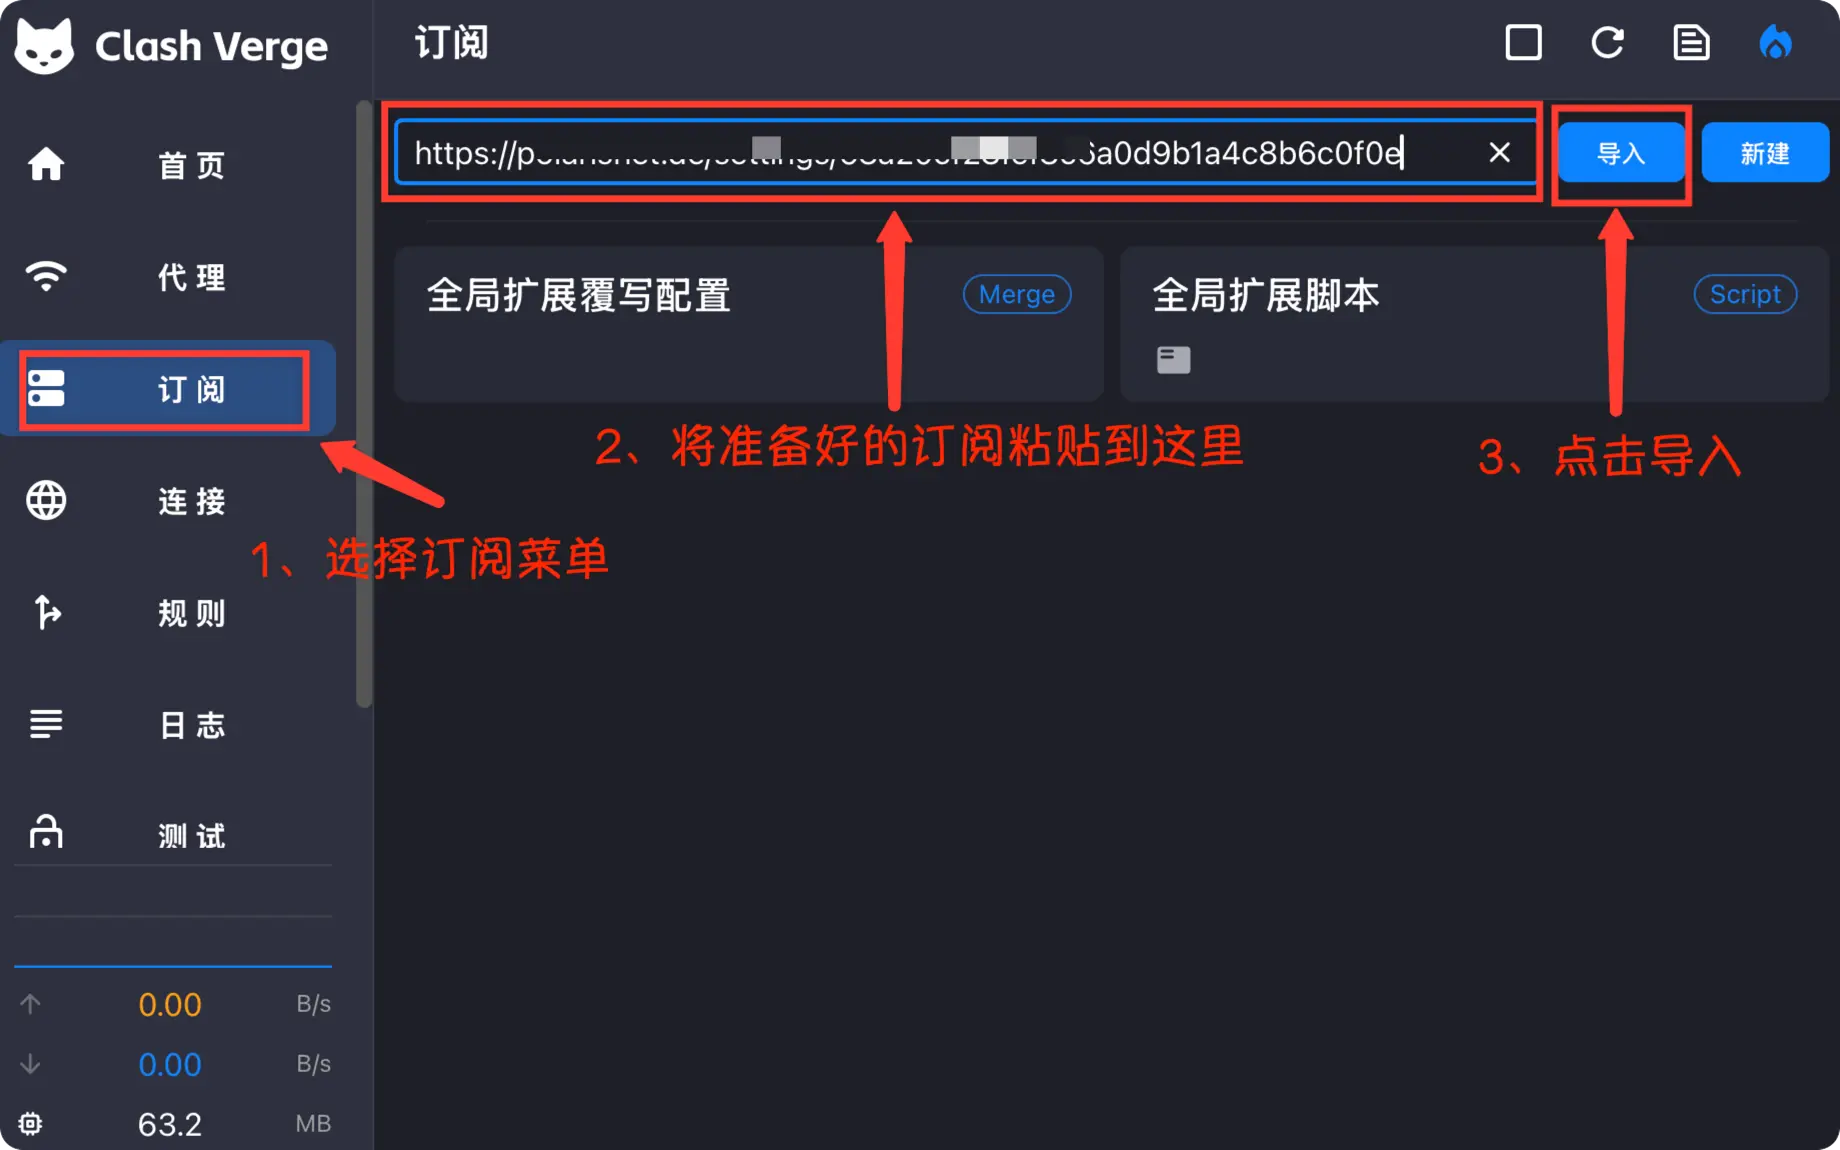
Click Profiles in the sidebar, paste the link into the input box at the top, and click Import.
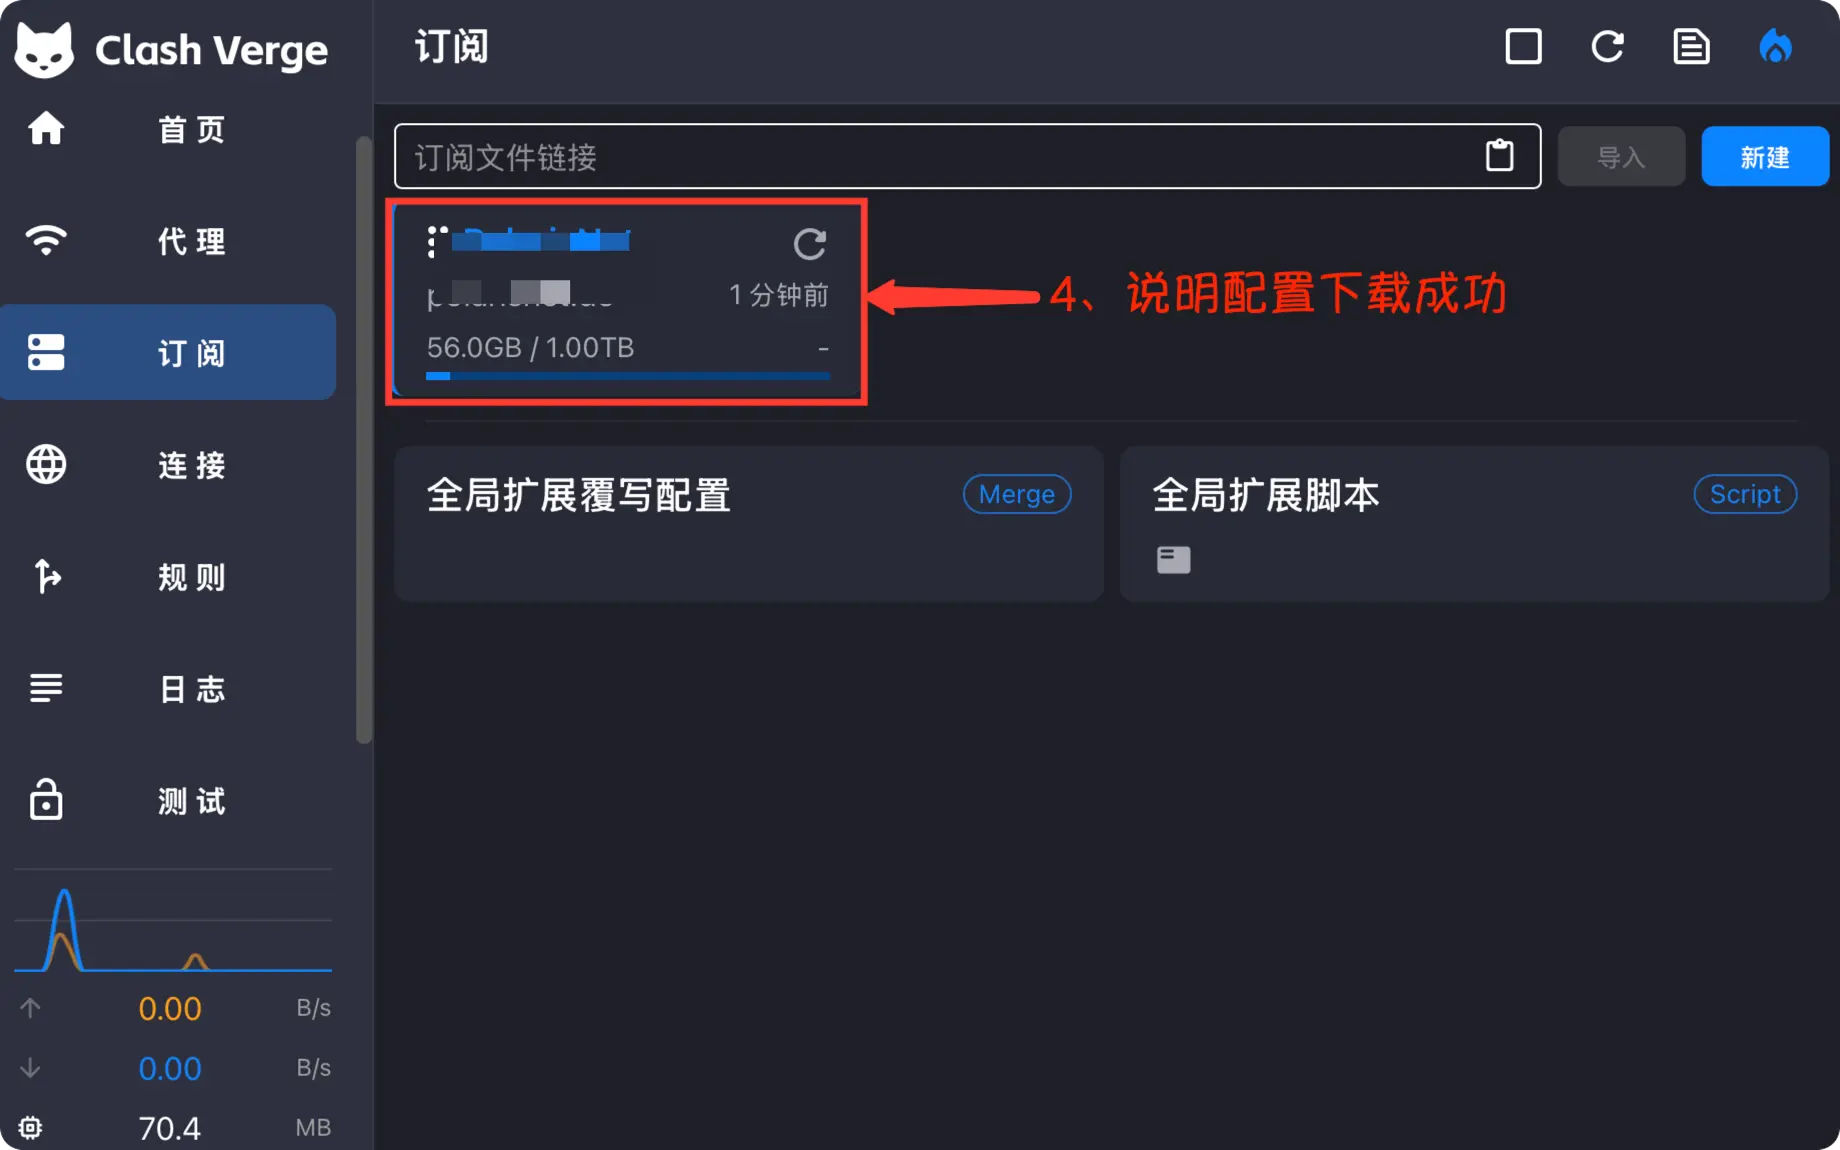
When a profile card appears with data usage and update time, the import worked.
Turn on the system proxy
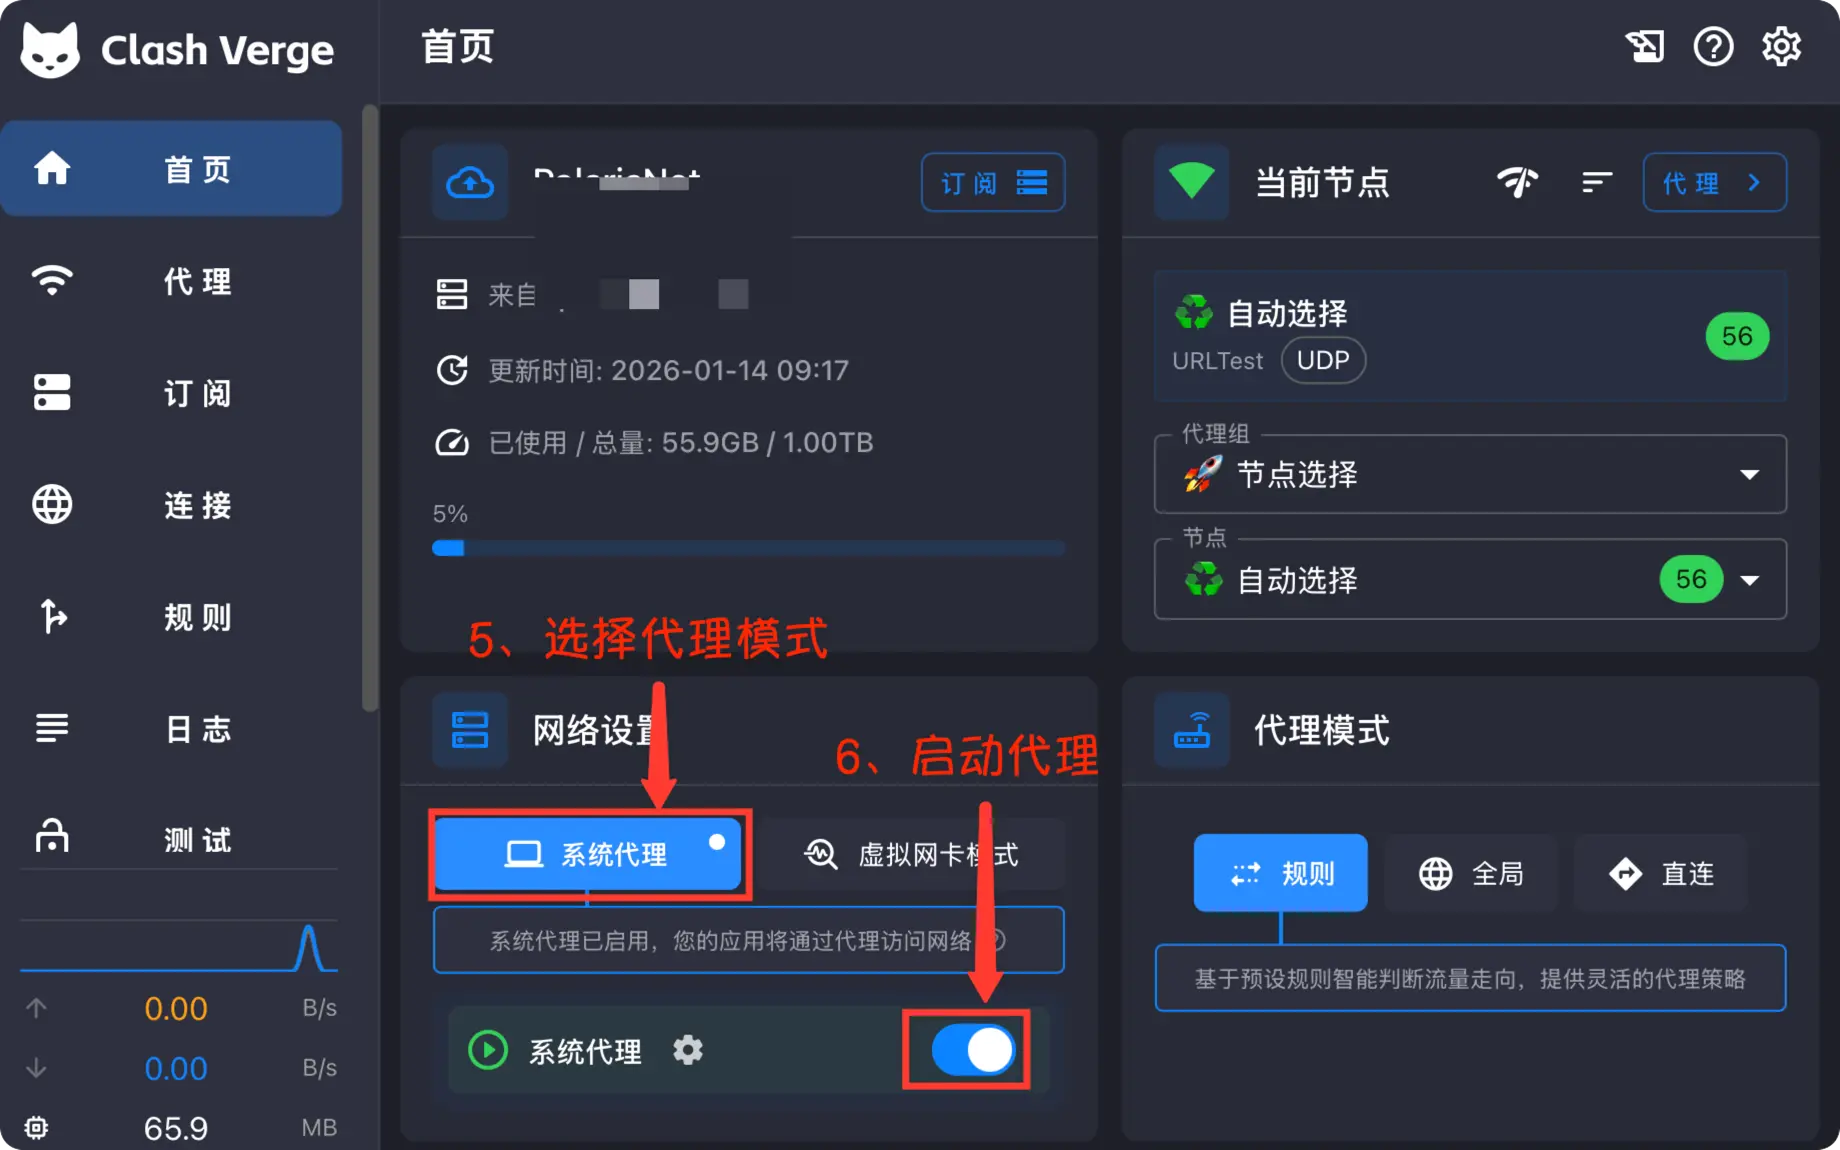
Go back to Home. Under network settings, choose System Proxy, then turn on the System Proxy switch. Keep the proxy mode on Rule.
Choose a server
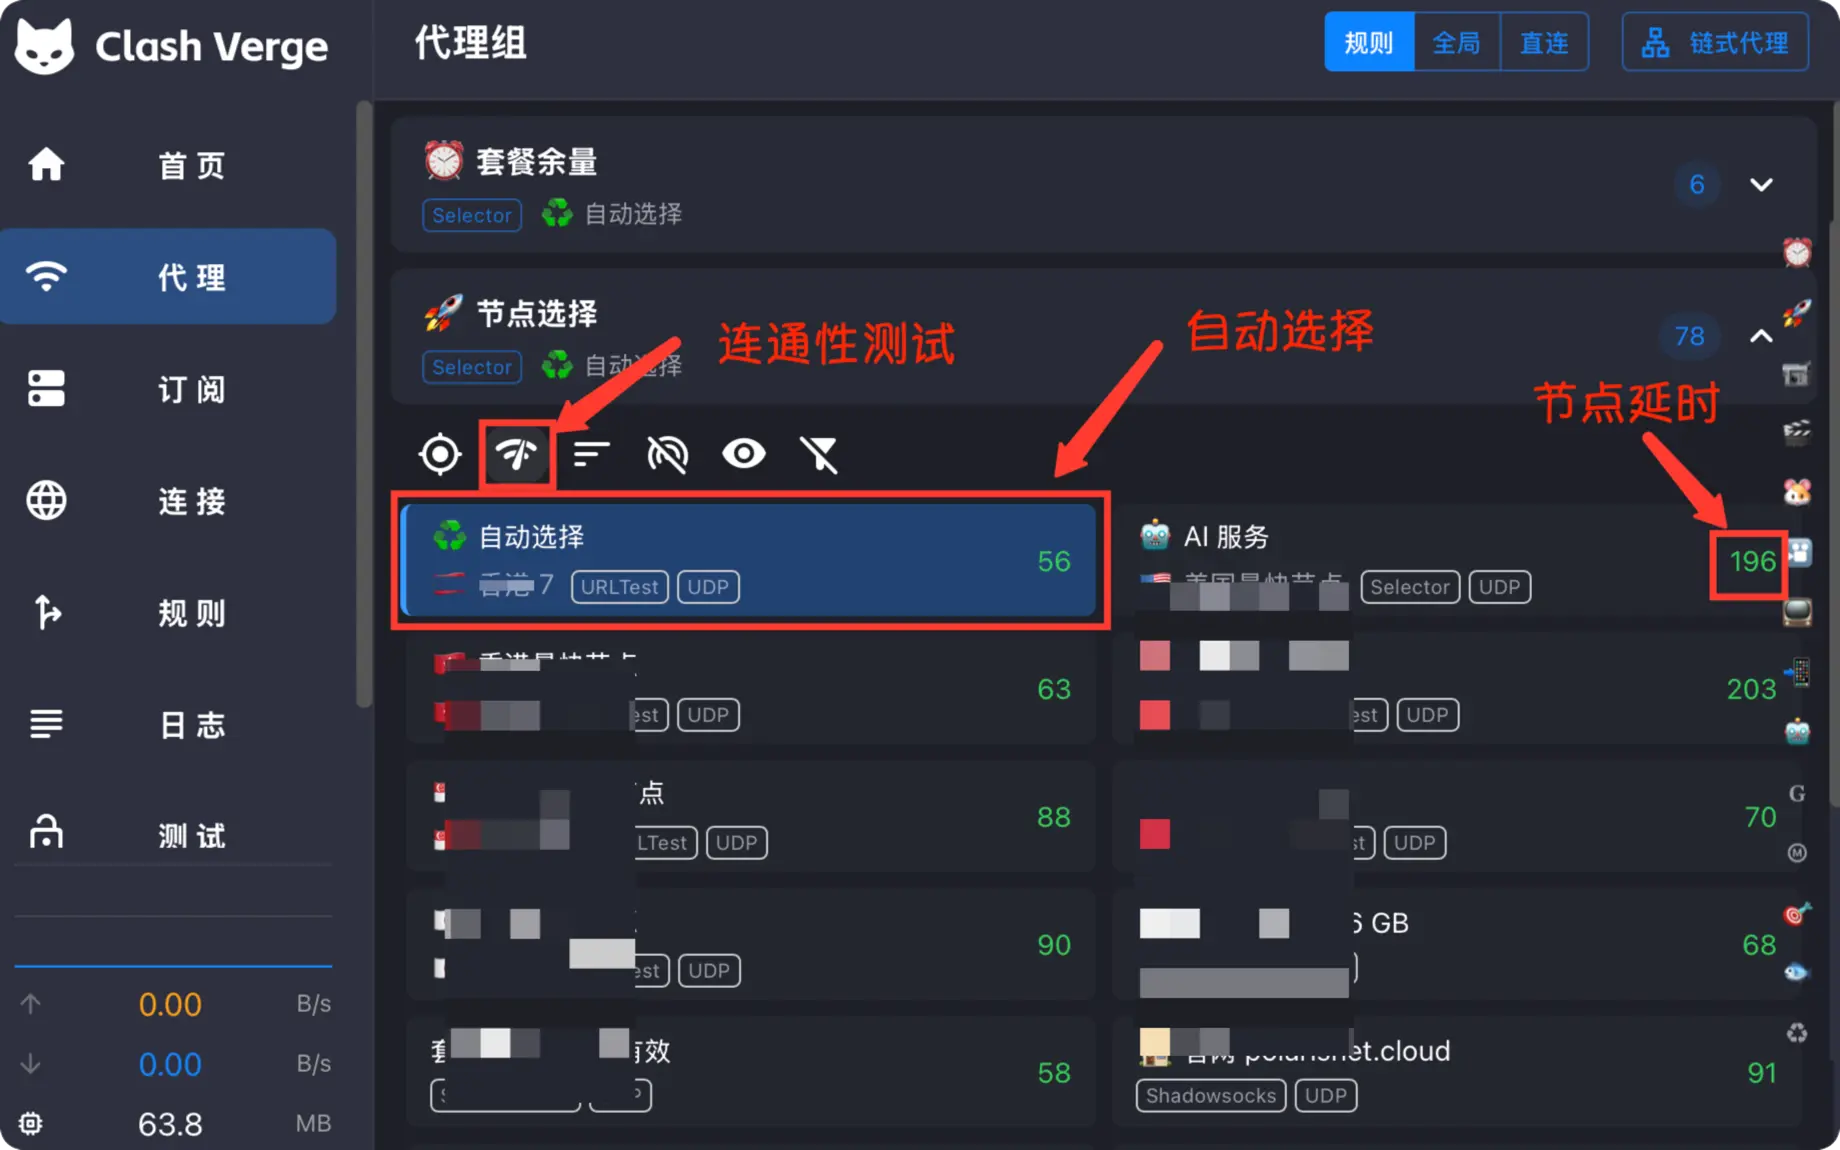
Open Proxies and click the latency test icon. Select Auto (automatic selection) or pick a server with low latency. If your usual websites load in the browser, you're done.
Advanced settings
TUN mode (virtual network adapter)
The system proxy only covers apps that respect system proxy settings. Games, terminals, and other apps that ignore it need TUN mode, which captures all traffic.
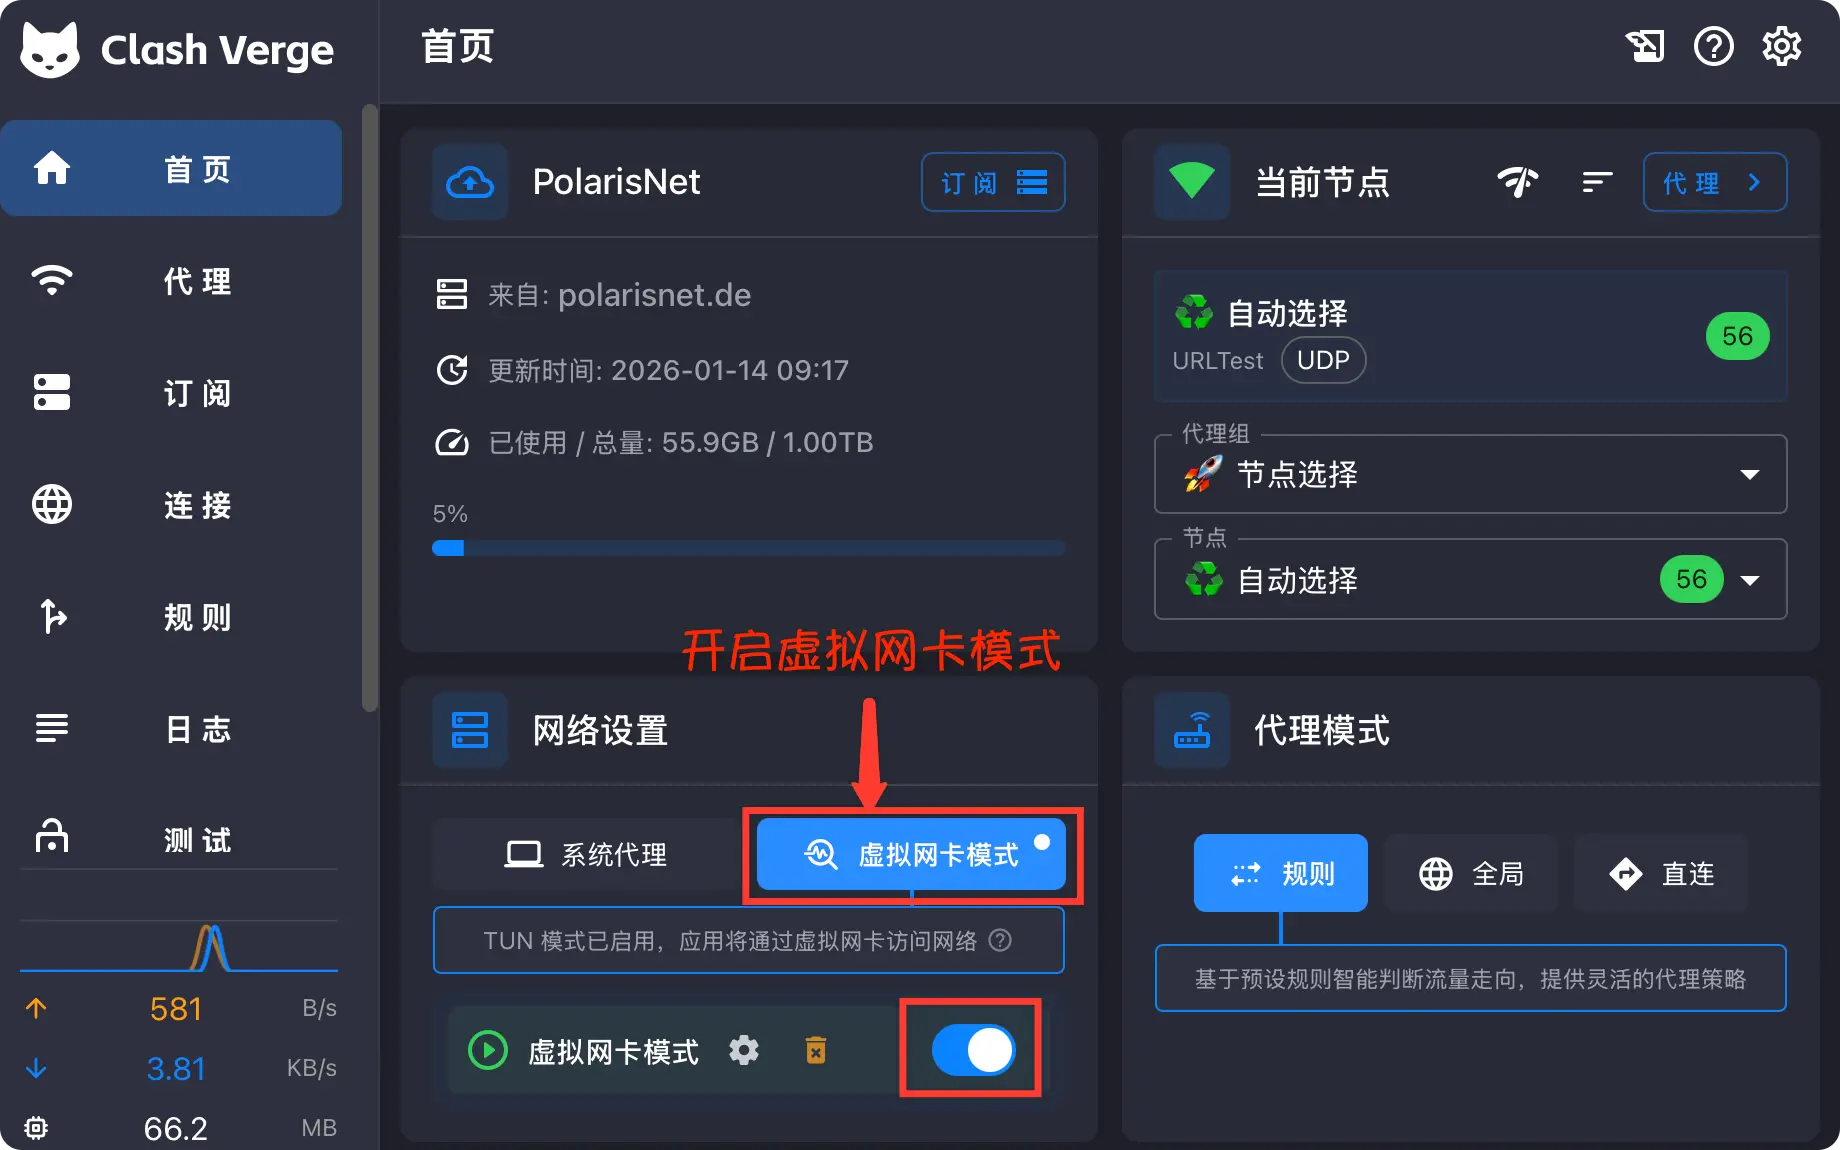
On Home, switch the network setting to TUN mode and turn it on. On Windows, install the service mode or run the app as administrator when prompted.
Enable IPv6
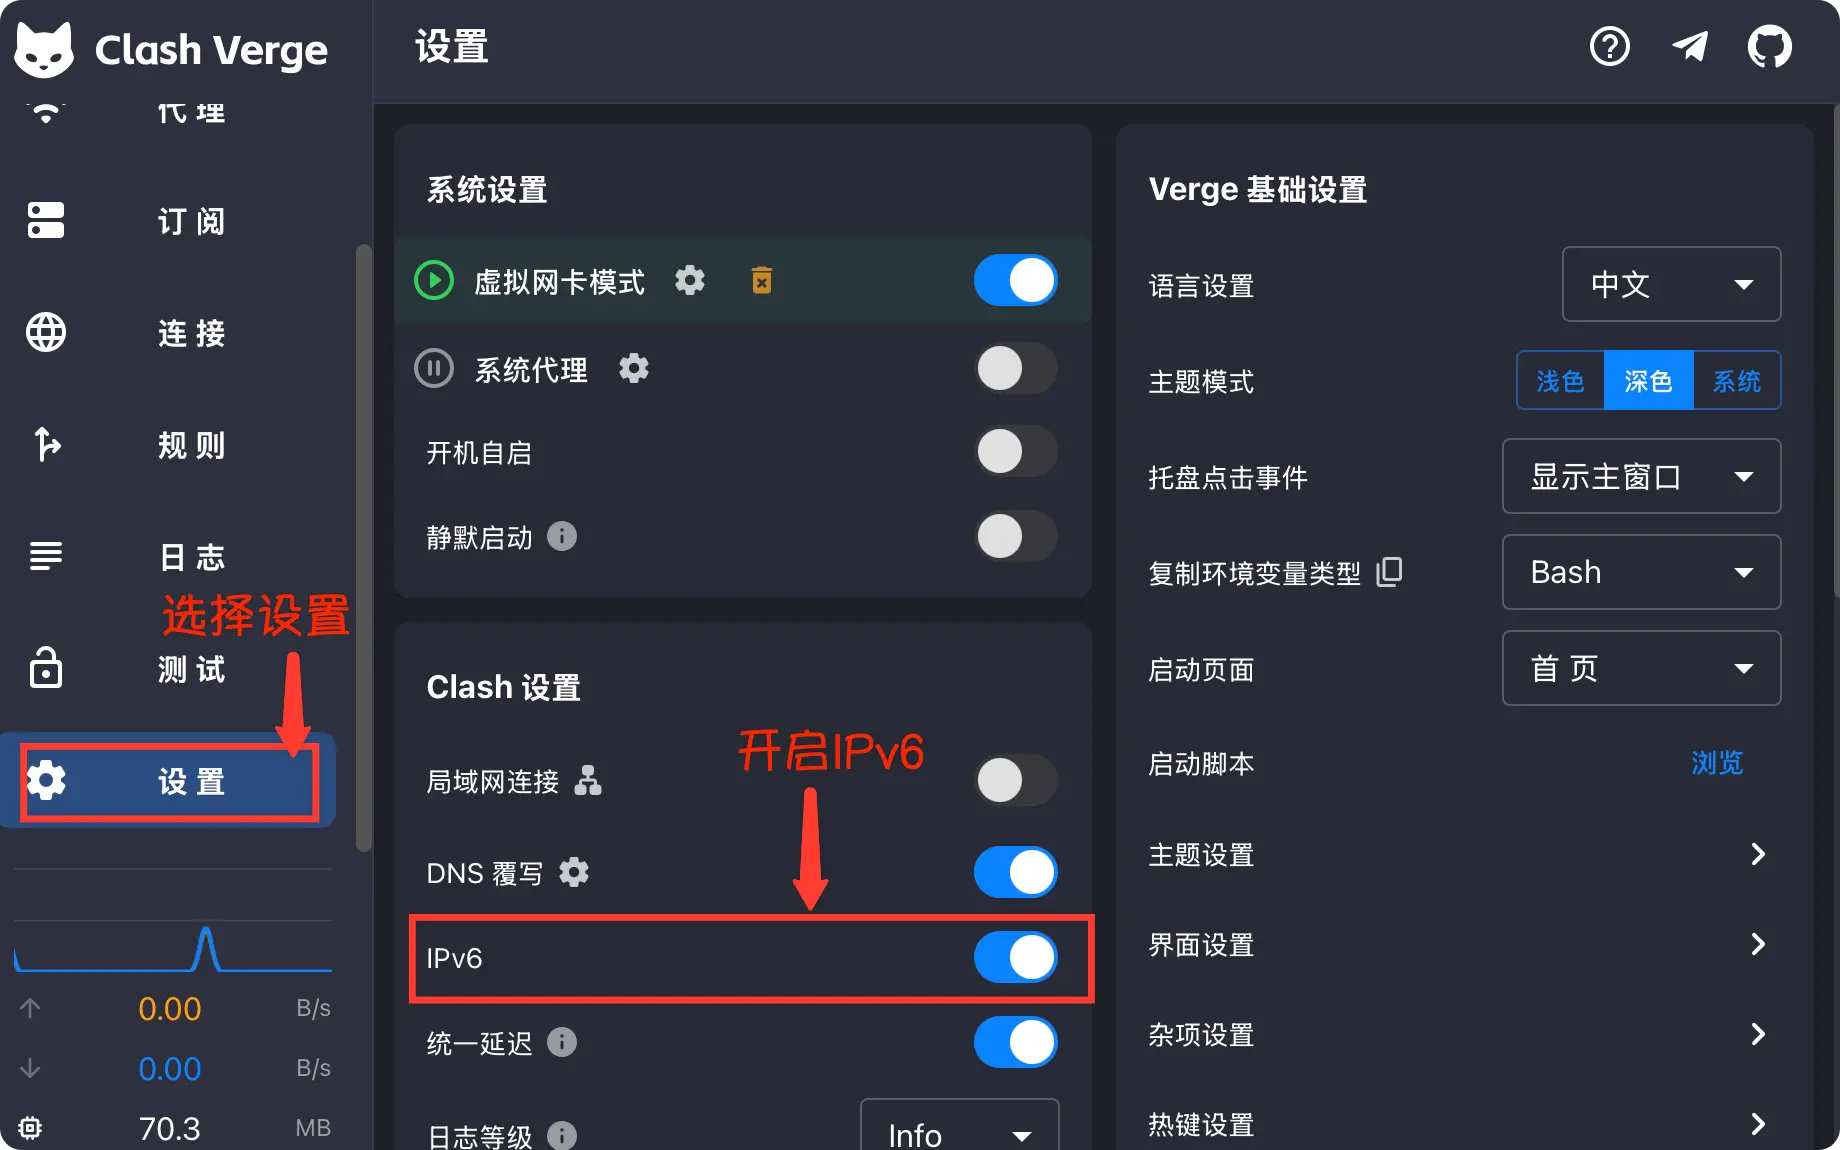
Go to Settings → Clash Settings and turn on IPv6.
Your local network must support IPv6. Check at test-ipv6.com: IPv6 works only if the page shows an IPv6 address. If the test fails, your ISP or router probably doesn't provide IPv6, so leave it off.
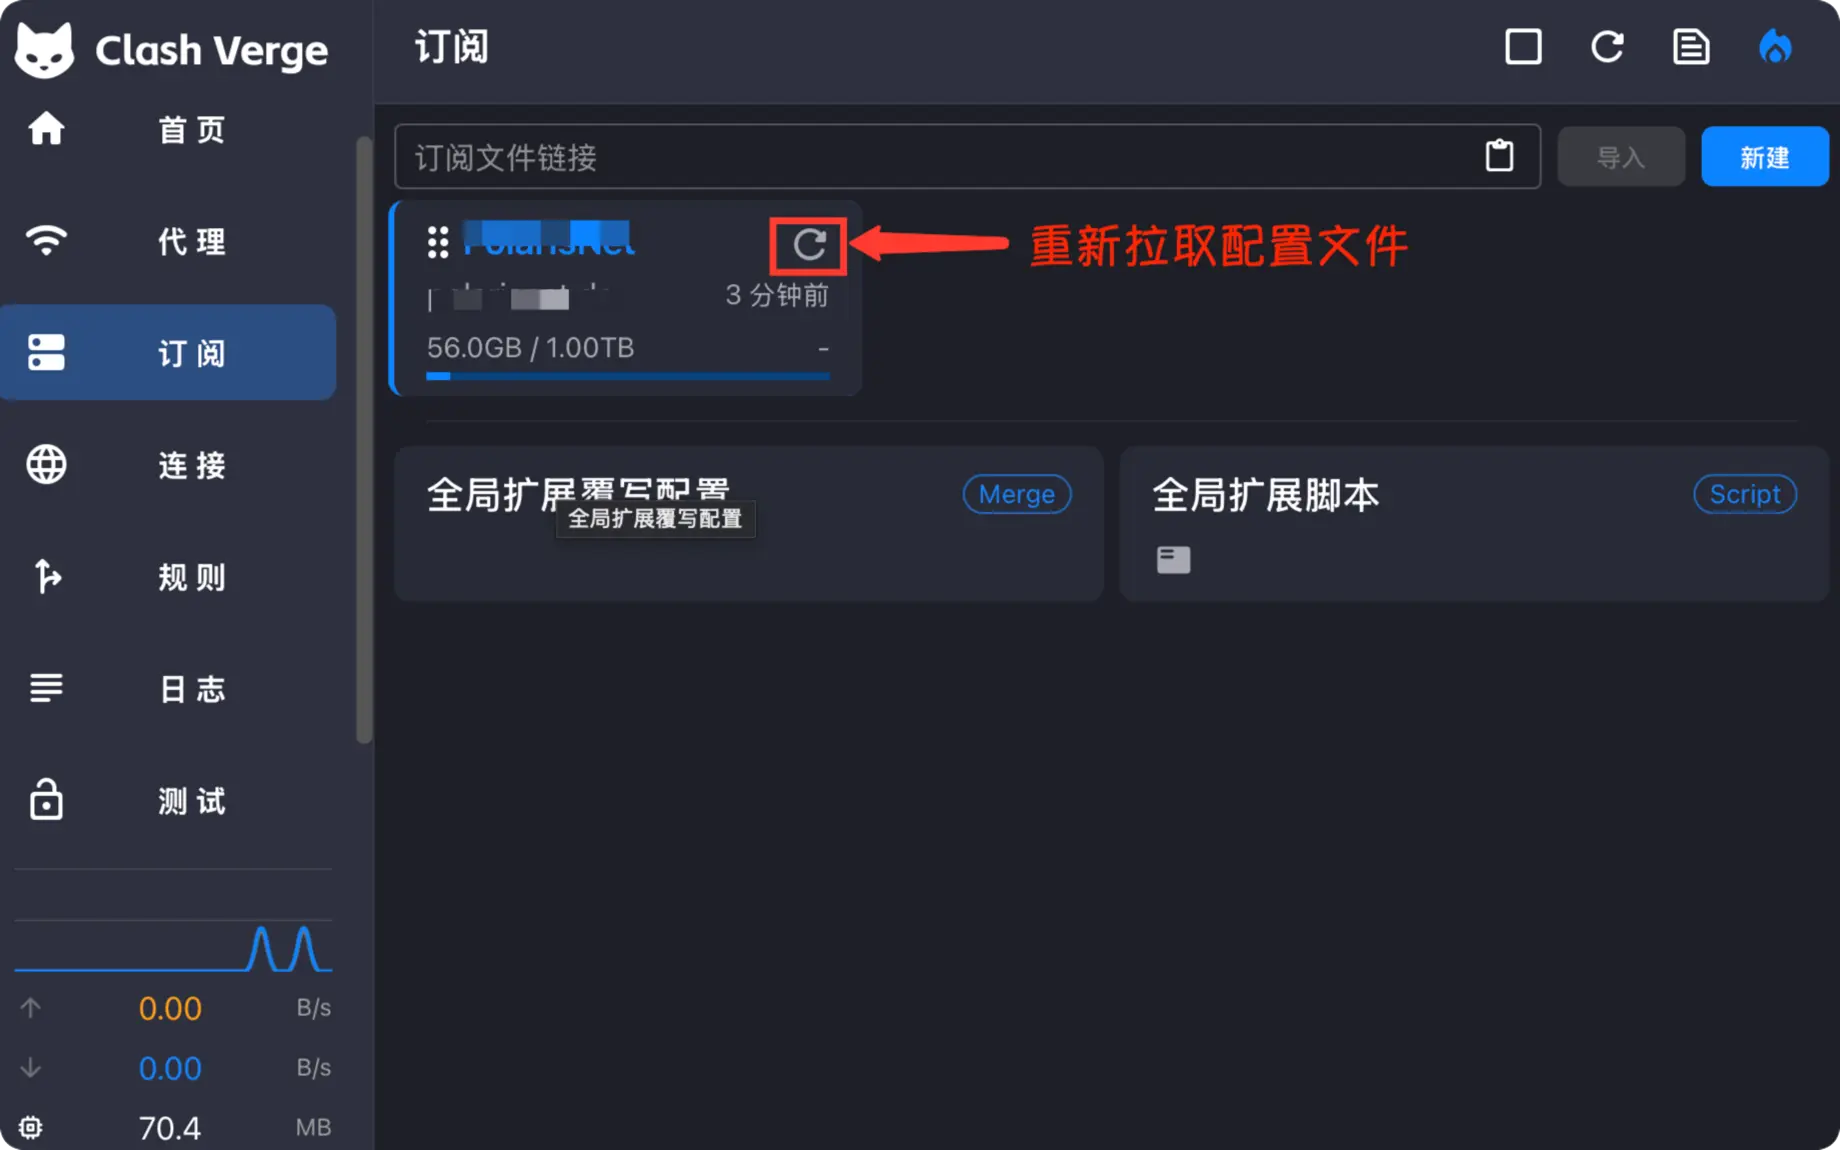
Update the subscription
When your provider changes servers, open Profiles and click the refresh button on the profile card.
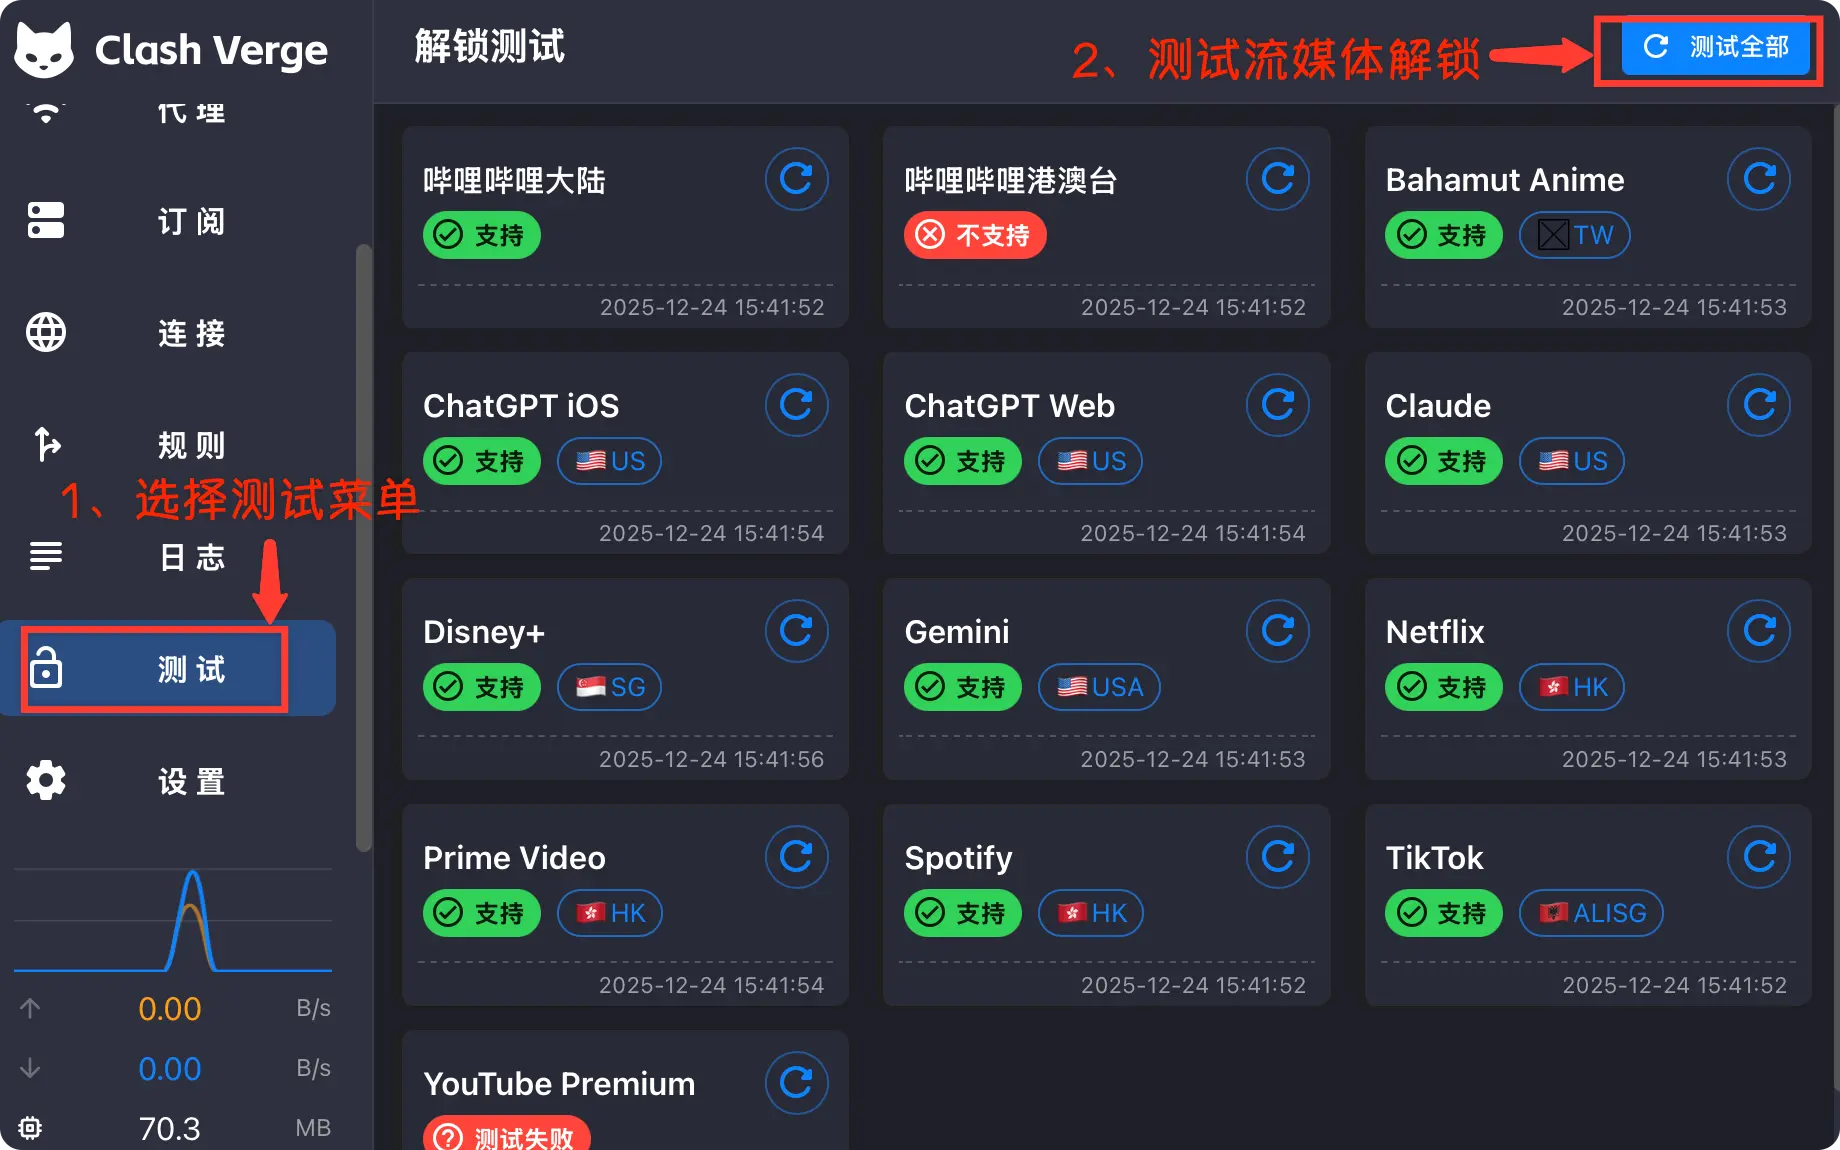
Check AI and streaming access
The Test page checks whether ChatGPT, Claude, Netflix, and other services work through the current server. Run it again after switching servers.
FAQ
This is macOS blocking an unnotarized app; the file isn't actually damaged. Open Terminal, run the command below, and open the app again:
sudo xattr -r -c "/Applications/Clash Verge.app"